How to use the Contextual Animation Plugin in your Multiplayer Games (UE 5.3+) w/ Doğa
In this post we will learn how to use the Contextual Animation Plugin for our synced animations. This article wouldn’t be possible without Doğa’s contributions.
Introduction
Unreal Engine released with a Contextual Animation System to create synced animations for specific actions, we could hear about it first in the Unreal Engine 5 revelation video:
This system allows us to play animations that require some sort of synchronization, in both transform, and timing. In order to activate the feature, open Edit and within Plugins windows, turn on Motion Warping and Contextual Animation.
How to setup a Contextual Animation
All the Actors part of a Contextual Animation require to have a ContextualAnimSceneActorComponent. The Plugin handles alignment of these Actors using Motion Warping. Therefore, only the Actor initiating the interaction and requiring synchronization towards the designated transform needs to be equipped with a MotionWarpingComponent.
Contextual Anim Scene
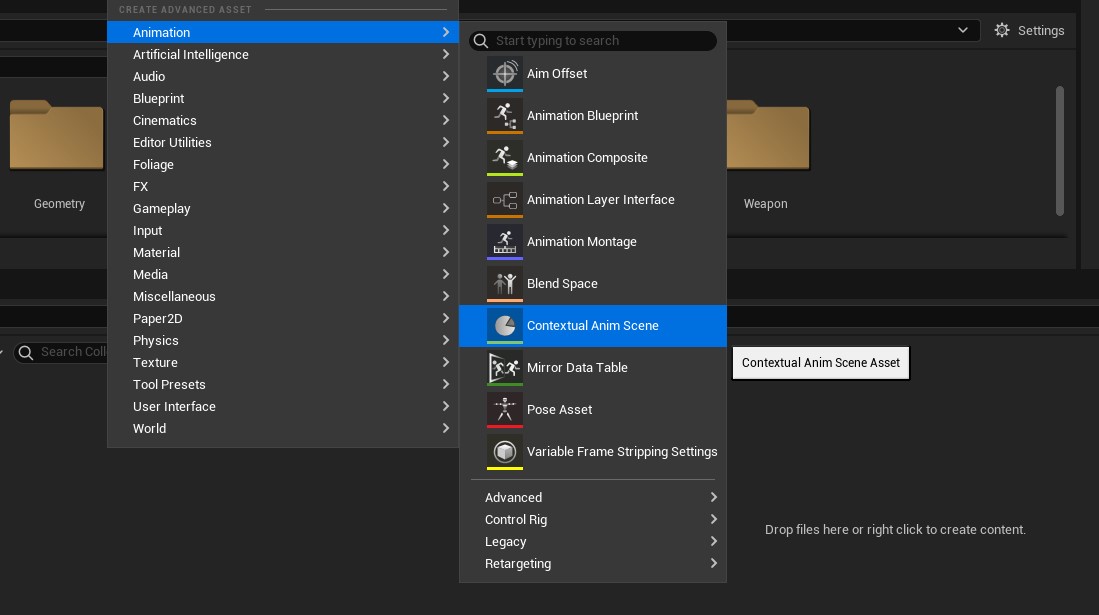
Once we have granted all the required components to our Actors we can create our first Contextual Anim Scene Asset. For that, create a Contextual Anim Scene (CAS) asset in the Content Browser.
If we open the newly created asset, we’ll find a viewport, a timeline and a series of properties we’ll tackle next. But first let’s focus on the Roles Asset.
This Data Asset defines the multiple roles by name in our Contextual Animation as in the image below.
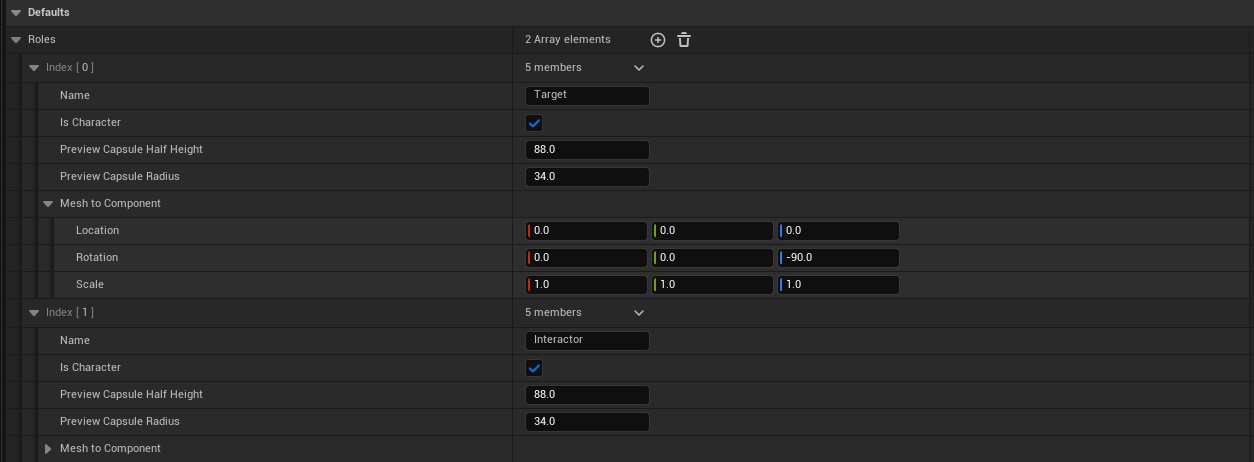
We recommend to provide somewhat generic names, as these assets are meant to be reused amongst multiple Contextual Anim Scenes. In the image Interactor is the Actor that starts the interaction, and Target is the Actor we interact with.
Then, in the CAS asset we assign the Roles Asset we just created, and for our example, we set Target as the Primary Role (the Actor we want to interact with). Then, add as many entries to the Override Preview Data array as participants are in our contextual animation, defined also by the Roles Asset.
In our case we have two participants, so we extend the array with two elements as follows:
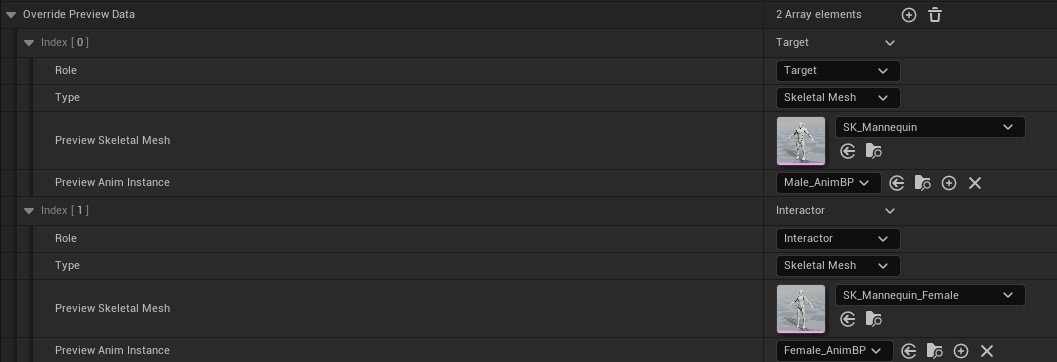
In my case, the female mannequin starts the interaction.
Note: Contextual Animations can also be used against non-animated Actors (ie: sitting on a chair), which would also need to be part of your Roles Asset.
Animation Sequence requirements (and Montages)
After configuring our CAS asset with all the required properties we are ready to start creating animation tracks. But before we start, let’s take a look at the requirements of the Animation Sequences composing our animation track.
The Contextual Animations System employs motion warping internally to warp the selected participants to a specific Transform. This ensures that animations are played correctly at the intended time and position, allowing for perfectly synced animations during gameplay, consistent with the original vision from the animation software (Maya, Blender…).
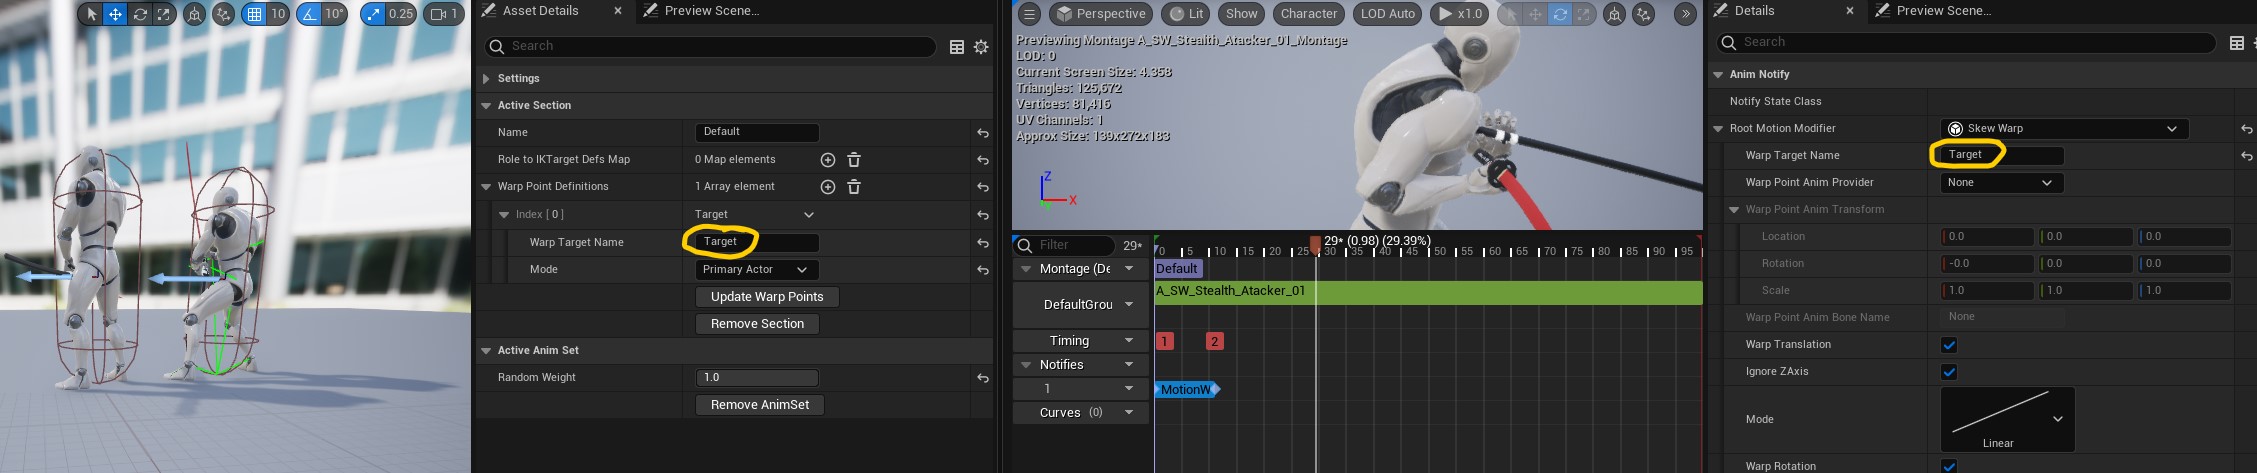
In our case, the Interactor should move towards Target before starting our takedown animation, for that we’ll enable Root Motion in the Animation Sequence of the Montage of our Interactor and then, we’ll add a Motion Warping Anim Notify State for the duration that we want the warp to last (the shorter, the faster our character will reach to the destination to play the Contextual Animation).
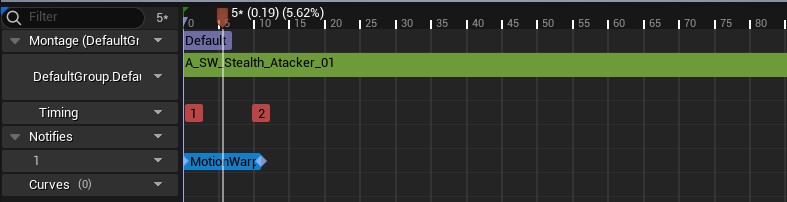
The Warp Target Name will be used later to define the synchronization transform in the CAS asset.
Note: Visit the motion warping documentation to know more about this feature and all the variables you’ll find in the Anim Notify State.
In our case, our Target Montage doesn’t need any additional configuration. However, if any character animation within the CAS Asset entails movement, Root Motion will be essential for their Montages, so that the character will move alongside the Root Bone’s movement.
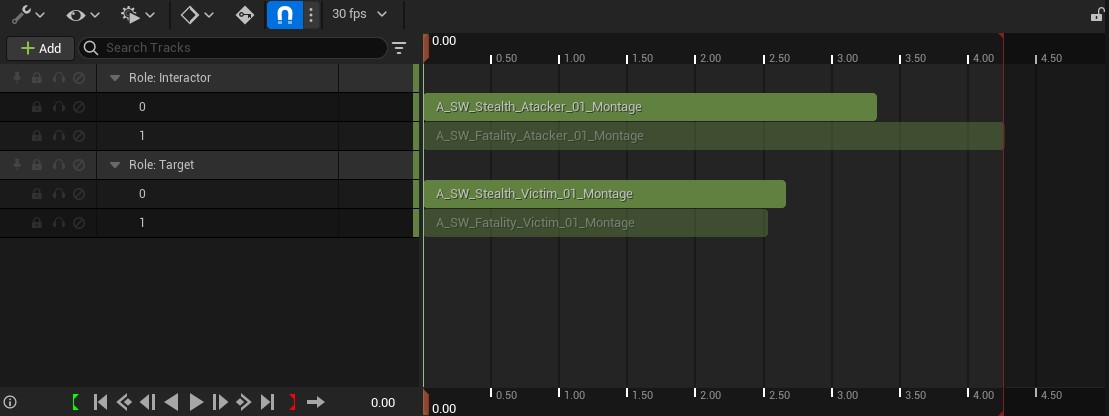
Note: Each animation track in the CAS asset consists of the combination of animations for all of our participants.
Creating a new track
To create a new animation track click on the button New AnimSet located at the top of the CAS Asset; it will promp you a window in which you can add a montage per participant (if applicable).
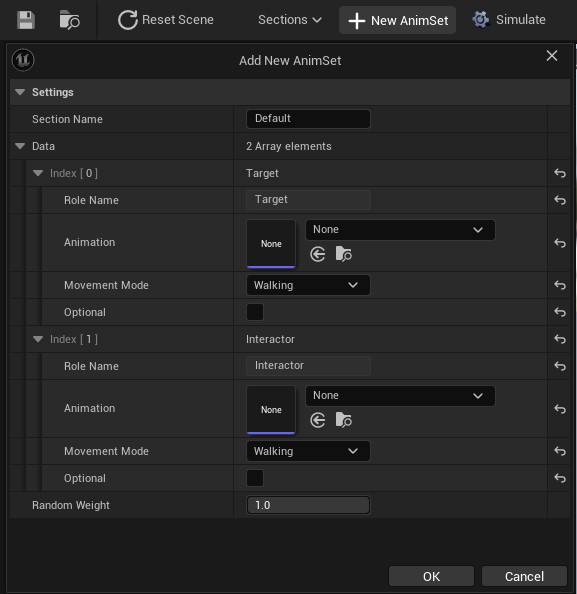
You can also tweak the Collision Behaviour between the participants and their attachment logic. For example, in the case of a takedown animation we would insert the attacker’s montage in the Interactor animation and the death montage in the Target animation.
After adding the montages, you can click on them in the animation track to adjust further parameters. Here we’ll find Mesh to scene, which will let you adjust the transform of your Actor to play the synced animation properly.
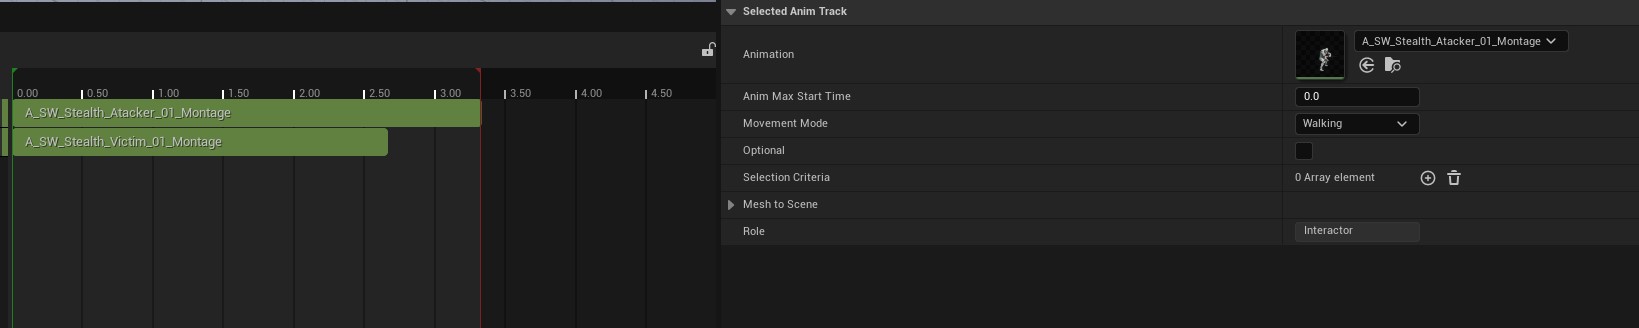
If done properly you’ll have something like this:
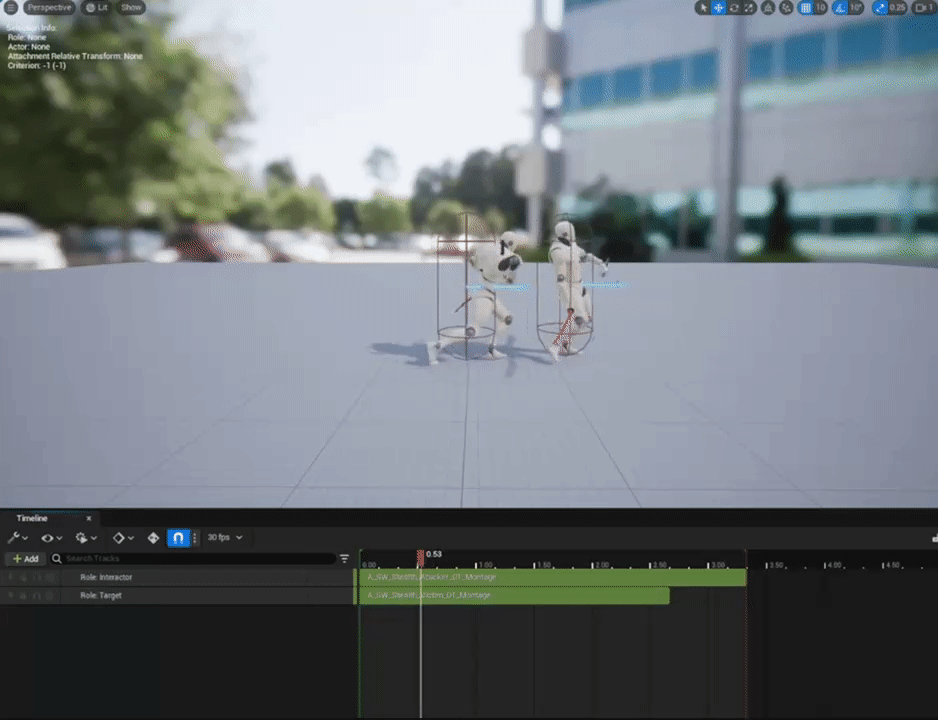
Our preview looks great! But if we want this to work during gameplay we have to configure motion warping in our CAS Asset. For that, add a new member on the Warp Point Definitions array, then on its properties write the name you’ve wrote in Warp Target Name in the previous section using the Primary Actor (Target) as the Mode, and finally, click on Update Warp Points. This will add a warping point in our Target Actor which will make the Motion Warping configured in our montage warp towards it.
Once done, we can add more AnimSets if we’d like to add varied montages to this Contextual Animation (ie: different takedown animations), the Selection Criteria will ensure we play a proper one.
Contextual Animation Selection Criteria
As previously indicated, a CAS can have multiple AnimSets, where each can contain its own set of Selection Criterias. In Contextual Animation Assets (CAS), the Selection Criteria sets the rules for determining which Anim Set fits the bill.
In simple terms, these Selection Criterias help pick out the right AnimSet for the job. At the beginning of the execution, the AnimSets undergo evaluation in a random order. The first one that meets all the Selection Criteria is chosen. But if none of them meet the criteria, no one will get selected.
Adding a Selection Criteria
To add a selection criteria, navigate to the Montage added within your CAS. Within it, you’ll discover a Selection Criteria array.
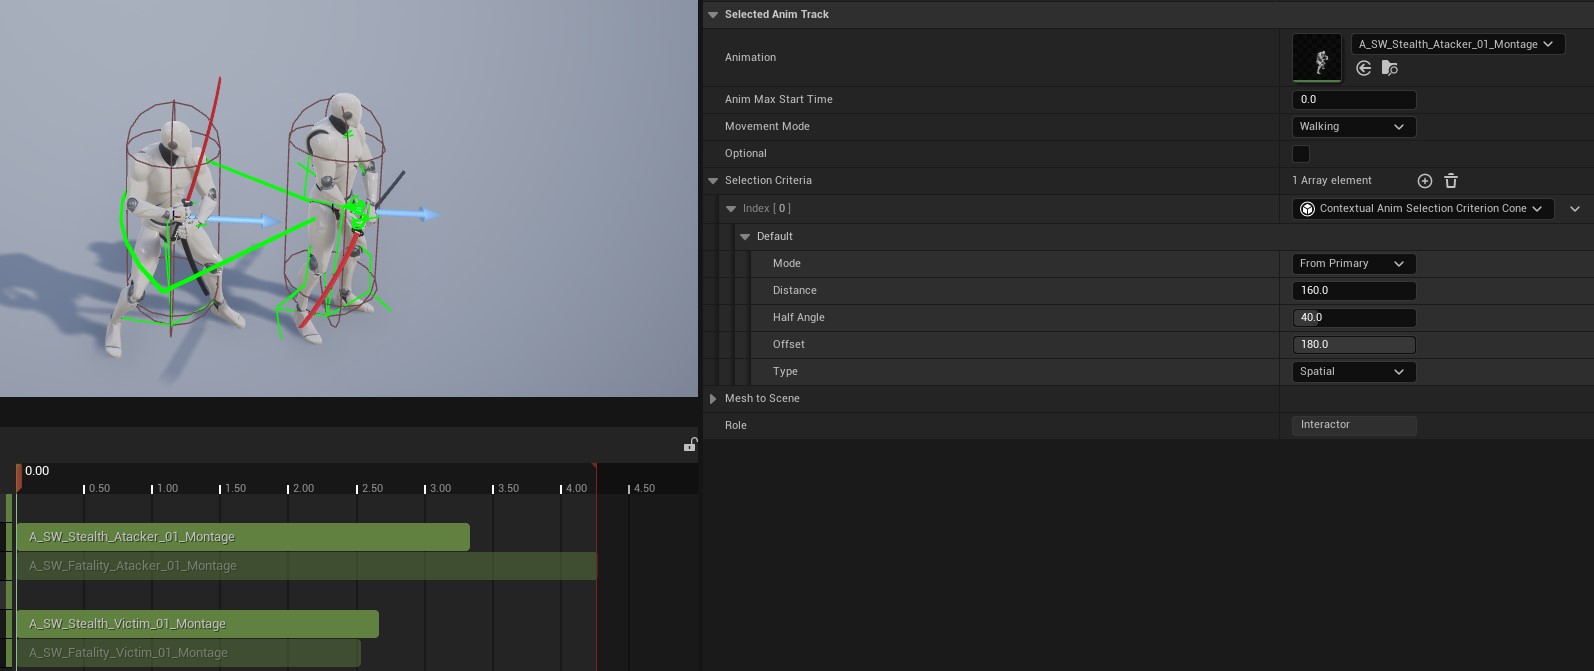
Within this array, you can incorporate multiple selection criterias, which can be defined using both C++ and Blueprints. The plugin comes with a few:
Contextual Anim Selection Criterion Cone: Checks if the target is inside a user defined Cone. If it is, the Criteria passes.Contextual Anim Selection Criterion Distance: Checks that the target is withing a distance range, can be evaluated in 3D or 2D.Contextual Anim Selection Criterion Trigger Area: Checks if the target is in a user defined 3D area, if it is, the Criterion passes.
Some of these criterias come with debug visualization.
How to play a Contextual Animation during gameplay
Playing Contextual Animations in Blueprints and C++ is very easy, all it takes is 2 functions:
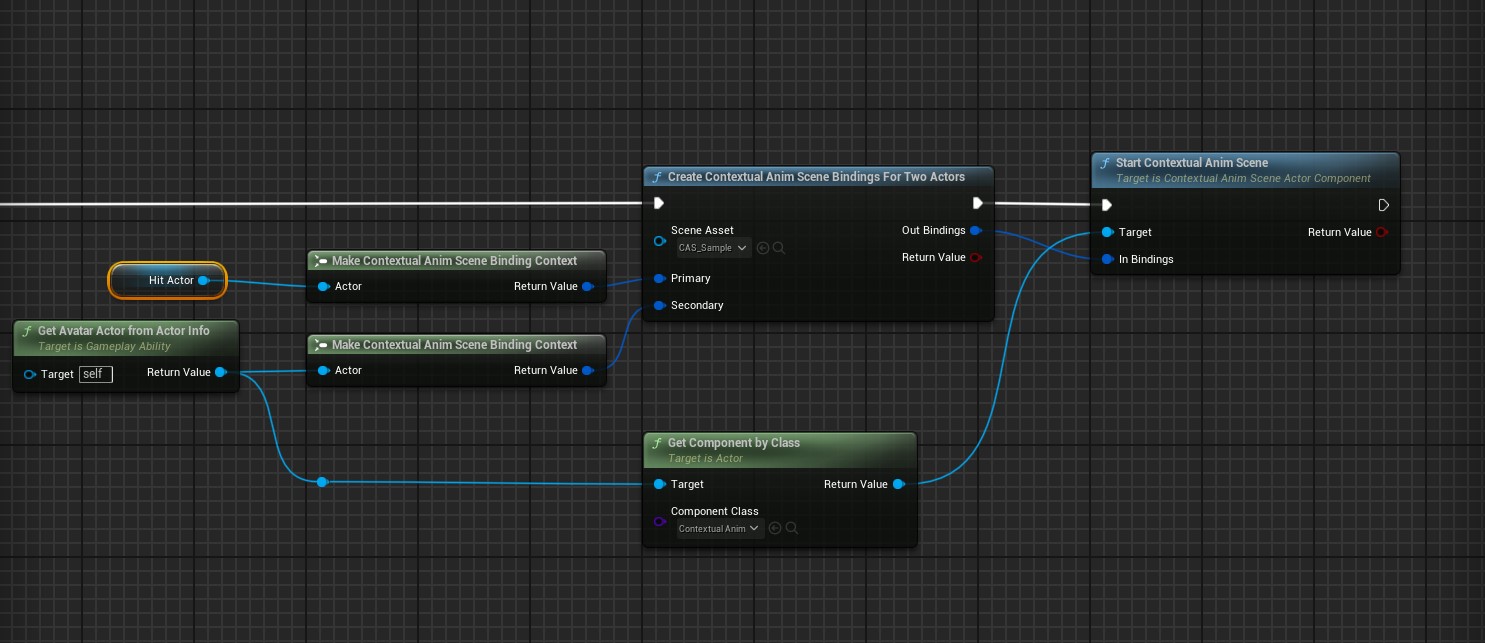
In the example above I’m playing the contextual animation inside an Ability instigated by the attacker, therefore Primary will be the Victim and Secondary the attacker, like in the CAS. Once our bindings are setup, we can start the Contextual Anim Scene.
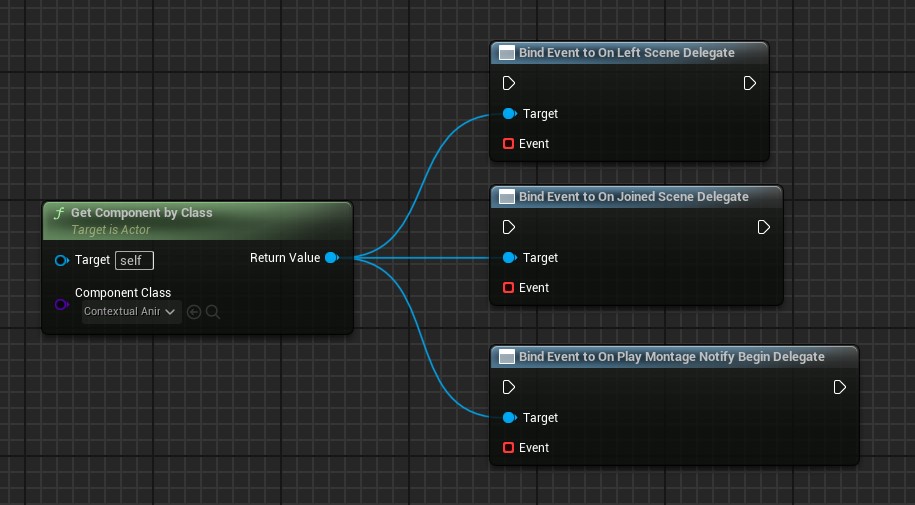
Extra functionalities
The Contextual Anim Scene Actor Component defines a series of delegates we can use to react to different events occouring during the Anim Set.
Contextual Animations can also be earlied out if desired by calling EarlyOutContextualAnimScene from Contextual Anim Scene Actor Component.
Multiplayer details
Contextual Animations implement multiplayer support for you, so you shouldn’t have to worry about anything when it comes to making them work in multiplayer.
At the time of writing Contextual Animations should be called only from the server or from an autonomous proxy (ROLE_AutonomousProxy) and they do not support prediction. To give an example of this, in the Ability example from above I’m starting the Anim Scene only on Authority.
If you’ve done everything correctly, you’ll be able to do many cool things (courtesy of Doğa):
Conclusion
Hey!
I hope you found interesting this pseudo article/tutorial.
This was possible thanks to my friend Doğa, who not only proactively shared his knowledge with us by the means of collaborating in the writing of this article, but also shared two very cool examples he crafted. I think a very nice way to thank him would be to follow on his social media!
Now as a I always say, happy deving!
Enjoy, vori.